As winter carries on, many of us must deal with layers of snow surrounding our homes.
And while we all might love the sight of a winter wonderland out of our windows, it can quickly become frustrating when you need to do such basic tasks as…
Leaving your house.
So as you prepare to remove snow from your driveway, it’s good to arm yourself with the best snow removal hacks. These can save you time, reduce your mental stress, and help you stay safe.
As innocuous and mundane as clearing snow from your driveway might seem, it’s not without dangers:
From 1990 to 2006, there were an average of 11,500 snow shoveling-related injuries EACH YEAR, according to research published in the American Journal of Emergency Medicine.
So having the best snow removal tips isn’t just good for saving you time and energy, but hospital visits as well.
And with that in mind, let’s start our list:
Tip 1: Double-check the weather forecast
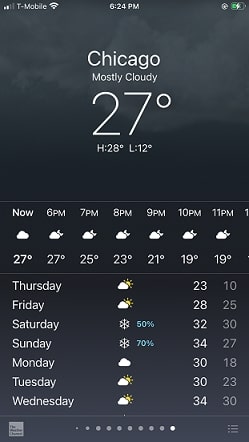
It sounds obvious, but you’d be surprised how many people skip (or simply forget) this step.
It’s a huge help to know whether it will snow again soon, and if so, when. You don’t want to spend a chunk of your day clearing snow, only to have to shovel off a light layer the next day.
Simply checking the weather in advance will allow you to get the most amount of snow removed for the least amount of your time.
And remember: reducing the amount of work you do clearing snow doesn’t just mean reducing your timespend, but the amount of strain you put on your body.
Tip 2: Before you go out, stretch
You might be tempted to ask: “Can’t I just go out there and start clearing snow?”
Well, you CAN, and for some, it won’t be the end of the world. But even if you’re young, and/or fit, and/or using a snow blower instead of a shovel, you still should probably stretch first.
And that doesn’t mean casually flexing or extending your arms and legs, but doing some full-on stretches, in which you hold a position for a period of time. It doesn’t need to be a yoga session, and can just take a few minutes—but it should still be a serious stretch nonetheless.

Why?
Removing snow will usually involve some amount of hunching and back straining. Even if you use a snow blower over a shovel, this could be the case. And straining your back for an extended period of time in freezing weather is simply not safe unless you’ve stretched first.
Tip 3: Make sure you are properly clothed and equipped
You probably already know the basics: dress warmly. Make sure you have proper gloves on, probably earmuffs, well-padded shirts, jackets, pants, and so on.
There are two important items to emphasize, however:
First, your shoes. You probably already know to wear thick boots for the snow. However, it’s important to make sure your boots are designed to give you some traction with the snow.
It’s good for making walking easier, but it’s also very important for safety (as it can prevent you from slipping and falling).

Secondly, this:
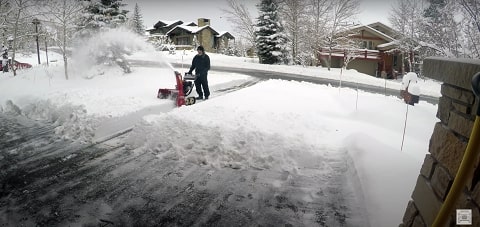
Tip 4: Pick a snow blower that’s right for you
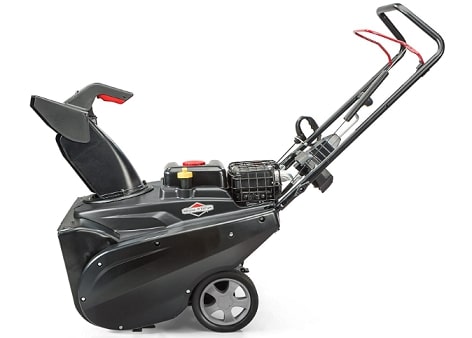
In general, snow blowers significantly involve less back straining than shovels. This is partly because they involve less hunching over by design, and less exertion: you just need to push.
But they also provide a safety bit by saving you time—by reducing the amount of time you’d spend hunched over.
So how do you pick a snow blower that’s right for you? The most obvious, and important, consideration is the amount of snowfall where you live.
How heavy are the snow days? How frequent are they?
Another major point to consider is the ease of use. That means the easiness of getting the snow blower started, keeping it powered, actually using it, and cleaning it. Plus, how much physical stress a given snowblower’s design reduces.
There’s a wide range of snow blowers, with a bunch of different pros and cons. Some are less physically demanding to use but not as high-powered for moving snow; others are the opposite of that; and still others have the best of both worlds or the worst of both worlds.
Luckily, we’ve done some research for you—these are the best snow blowers available right now.
Tip 5: Plan your path
Having a decent idea of what your snow clearing path should be before you put yourself out there in the snow will save you a lot of pain.
It doesn’t need to be too complicated: just grab a piece of scratch paper or a notepad (or use your phone’s notepad app), and draw out the direction of your path.

As long as you’re taking into account the shape of your driveway and any nearby objects, you can figure out the best path pretty quickly—the one that will involve the least stops, turns, time, and stress on your body.
Tip 6: If you have a traditional, rectangular driveway…
If you have a normal, one-car driveway, it’s best to make sure your direction is primarily along the length of the driveway, rather than the width.
 That’s simply because working around the width more will involve a lot more turning of the snowblower. Even if you have a lightweight snowblower, it can consume a lot of time, make you more aggravated, and involve unnecessary exertion.
Tip 7: If you have a wider, 3-car driveway, try this:
Those who have large driveways should consider a different tactic: going down the middle first.
Basically, you try to center yourself as best you can with your snowblower. Then, proceed to make a straight line down the middle of the driveway.
When you get to the end, pick a side/half to clear first. Go back up the way you came, then turn and go back down, etc—all the while, zig-zagging on the half of the snow you chose.
Then you can return to the middle and clear the other half. You don’t need to entirely clear both halves of the driveway, though you could if you want.
This is especially useful if you only need to get one car in and out of the driveway for the time being; you can just use the middle of your driveway to get in and out.
Remember to always keep your chute pointed in the same direction—you’ll need to turn it as you switch between going up and down. With it pointed to the side, you can just pile on snow to the parts you don’t care about clearing.
Tip 8: When there’s little or no wind, try this:
If there’s minimal wind, you can try moving in a circular fashion. This will usually work whatever your driveway shape/size is, but may be generally better for more normal sized ones.
Basically, pick your starting point, and move along the length of the perimeter of your driveway. Turn around the first corner you encounter, and continue along that side—repeat until you’ve circled the perimeter.
Once you’ve made a lap around the edges of your driveway, you can repeat and make another lap—but this time, a little more inwards.
Repeat this, constantly making laps in an inward spiral. The first lap, as you clear the edges, will be the longest, and the rest will be faster as the distance shortens.
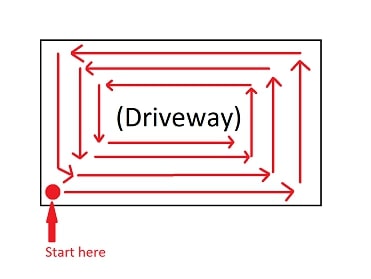
Why do this?
The main advantage is that, assuming no or minimal wind, you can keep your chute pointed in the same direction.
This won’t work for every home—it depends on how close you are to your neighbor’s driveway, whether you have fences, and so on.
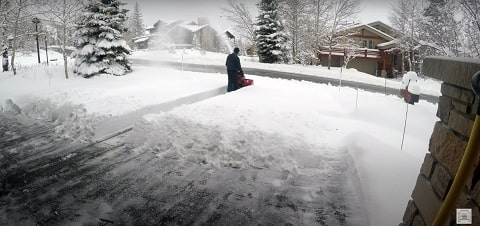
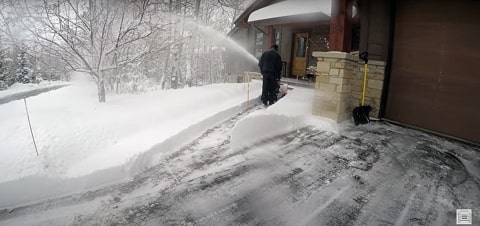
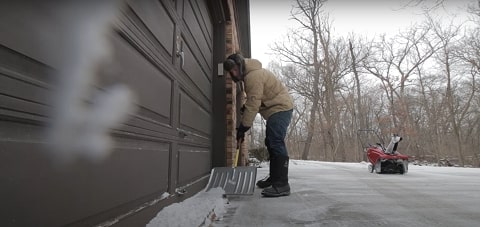
Tip 9: When there’s snow directly under your roof or soffits, shovel it off first
If there’s snow directly underneath an overhang of your roof, it’s best to use a shovel to push it forward a bit, away from your house.
If you start using your snow blower at that increased distance, it reduces the amount of snow that will get onto your roof, or that will spray onto your walls/windows a bit.
Tip 10: Place large strips of plastic or tarp on thresholds, under roof overhangs
Snow that gets on the edges of your roof will often melt and drip, then freeze on the ground.
The result is that you’ll have a bunch of ice inconveniently placed around the starting edges of your house—near your front door, maybe, or at the top of your driveway. Such ice is difficult to remove with a snow blower and may be difficult to remove with a shovel:
Typically you’d need to break it up first and then shovel it off, which can be physically demanding as well as time consuming.
And it’s not just worth your attention for convenience, but safety: ice can easily make you slip, even if you know it’s there.
So why use strips of plastic?
If you place sturdy sheets or strips of plastic directly under your roof overhangs, the melting snow will drip and freeze onto the plastic.
Then when it’s time for removal, instead of striking the ice to get rid of it, you can simply dislodge the pieces of plastic with ice still upon them. All you have to do is move them aside; it’s much less time consuming and strenuous on the body.
Tip 11: Save the path from the sidewalk to your front door for last
If the layout of your house is such that your driveway is pretty removed from your front door—if they’re on opposite sides of the house—then you can ignore this snow removal hack.
But if your driveway and front door are pretty close to each other, then this is a snow removal tip to note:
As you blow snow from your driveway, there’s a fair chance some snow will get onto the area of your front door. It’s worth saving for last just so that you don’t have to go back and re-clear any snow at the very end.
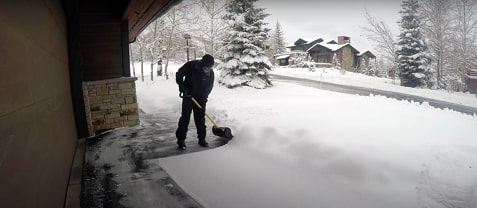
Tip 12: Use a shovel to fine-tune stuff at the very end
The reasoning for this snow removal tip is a bit similar to the piece of advice on saving the path to your front door for last:
During your snow blowing, even if you do an excellent job, there will probably still be some snow here and there, or untidy bits. Many people often consider themselves done once they’ve used their snow blower to clear the bulk of the snow.
However, it helps to take a quick tour of your handiwork, and then use a shovel to clear away any neglected patches of snow or snow that was accidentally thrown in a bad direction.
Conclusion
And there you have it! These 12 snow removal hacks are great for everyone who needs their driveway cleared.
Clearing snow strategically, taking care of your body, and having the right equipment are all essential to saving yourself time and preserving your health.
Stay safe this winter, and have fun!
 Jan 8, 2024
  Jan 8, 2024
  Jan 8, 2024
  Jan 8, 2024
  Jan 8, 2024